Contents
|
Poincaré Hyperbolic Disk Conformal Mapping Recipe
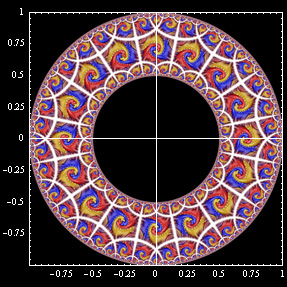
 This page explains how to create an interesting design from the Poincaré hyperbolic disk using only conformal mappings (angle preserving transformations). We begin with the (6, 4) Poincaré hyperbolic disk, meaning that each tile has n = 6 sides and m = 4 tiles meeting at each vertex. The disk will fit inside a unit circle if the central tile is scaled such that it's inner circle radius is
  , where , where  . .
|
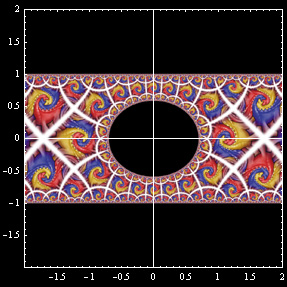
 First we apply a strip conformal mapping:
  . Notice that now the pattern repeats over a periodic distance P. In the case of (6, 4) tiles with an upright central tile we have . Notice that now the pattern repeats over a periodic distance P. In the case of (6, 4) tiles with an upright central tile we have  = 1.1221997046783607. = 1.1221997046783607.
|
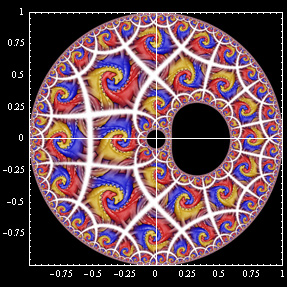
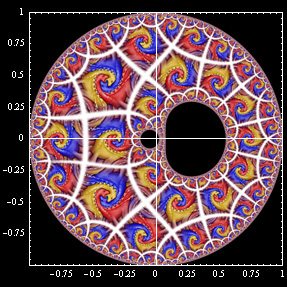
 Now we can apply an exponential mapping to close the ring using Vladimir Bulatov's formula:
  where k1 is any positive integer. You can read more about this mapping in Jos Leys' Ringworld article. The image on the left uses k1 = 16 to get a nice-sized hole in the center. where k1 is any positive integer. You can read more about this mapping in Jos Leys' Ringworld article. The image on the left uses k1 = 16 to get a nice-sized hole in the center.
|
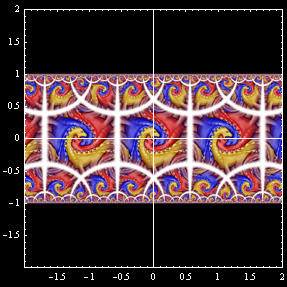
 Now let's apply another strip conformal mapping: . Notice that the hole has become slightly distorted and is no longer a perfect circle. Although the hole is no longer circular, all the tiles are still conformal (in general, all circle-preserving transformations are conformal but not all conformal mappings are circle-preserving).
The pattern is no longer periodic because the large hole in the center has distorted everything. However, the strip approaches quasi-periodic behavior far away to the left and right of the hole. The periodic distance is no longer a constant, but we can still try to close this strip into another ring using our original value for P combined with a non-integer value for k2 such that P k2 equals the distance between similar tiles spanning over the hole.
|
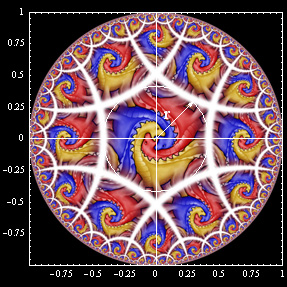
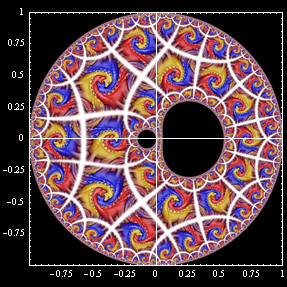
 Let's apply the second exponential mapping to close the strip into a ring:
  . The tiles will match better if k2 is large, but we want k2 to be small because the central hole will become much larger later. The image on the left uses k2 = 4.308696446994236. . The tiles will match better if k2 is large, but we want k2 to be small because the central hole will become much larger later. The image on the left uses k2 = 4.308696446994236.
|
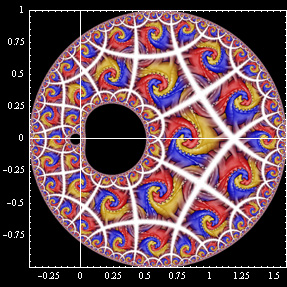
 We can try to create more holes by repeatedly applying the ring transformation, but the design becomes highly irregular and it is difficult to arrange the tiles without large gaps. For example, this image was created from three ring transformations using k1 = 16, k2 = 9.506616315974165, and k3 = 7, followed by a Moebius transformation to adjust the size of the holes. As you can see there are some large gaps between the tiles.
|
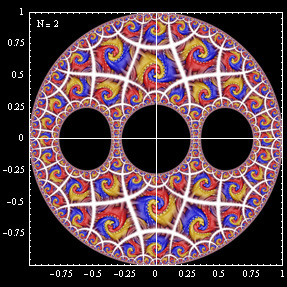
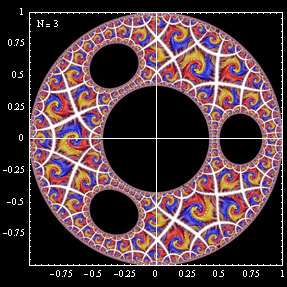
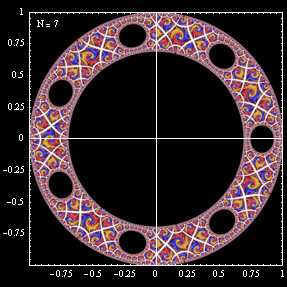
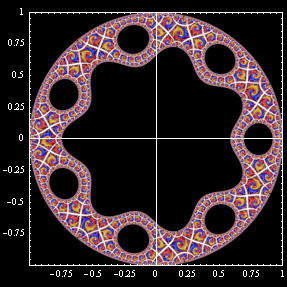
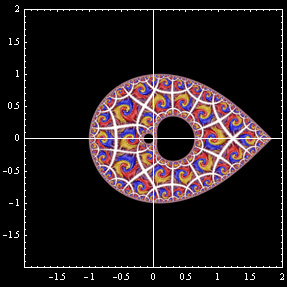
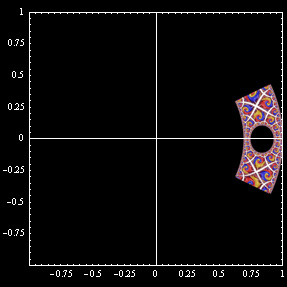 Suppose instead we take the disk with two holes and apply an integer root to convert the ring into an arc:
  , where N ≥ 2 is an integer. The image on the left uses N = 7. It is important that a hole contains the center point because this mapping is not conformal at that point. , where N ≥ 2 is an integer. The image on the left uses N = 7. It is important that a hole contains the center point because this mapping is not conformal at that point.
Note: It might be tempting to combine steps by assuming  . This is true only when . This is true only when  . .
|
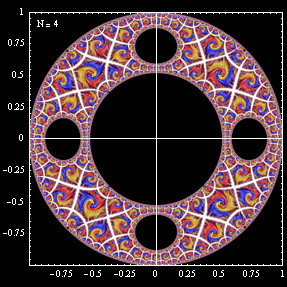
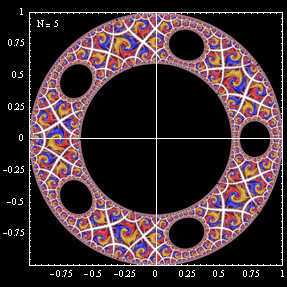
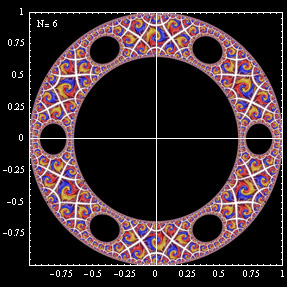
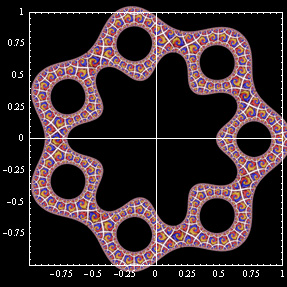
Now create copies of the arc and rotate them around until you complete the circle:  , i = 0, 1,... N - 1. Now we have a disk with many holes. Notice that the diameter of the central hole becomes much larger when the number of holes is increased. , i = 0, 1,... N - 1. Now we have a disk with many holes. Notice that the diameter of the central hole becomes much larger when the number of holes is increased.
|

 If we go back to the previous step and move the central hole slightly while preserving the outer boundary of the disk, then the transformed hole will have ridges. This can be accomplished using a special Moebius transformation:
  . This image uses b = -0.05. We will have to keep adjusting the value of b in the following steps in order to ensure that a hole always contains the center point. . This image uses b = -0.05. We will have to keep adjusting the value of b in the following steps in order to ensure that a hole always contains the center point.
|
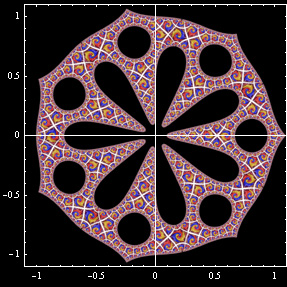
 Notice that the above transformation is very sensitive near the center point. If we carefully select
  = -0.07435343472389844 so that the central hole is just barely touching the center point, then in the last step there will be sharp spikes meeting at the center point. = -0.07435343472389844 so that the central hole is just barely touching the center point, then in the last step there will be sharp spikes meeting at the center point.
|
 We can also create ridges around the outer perimeter by simply moving the entire disk slightly before the final transformation:
  . This image uses x = 0.6 and b = -0.64. . This image uses x = 0.6 and b = -0.64.
|
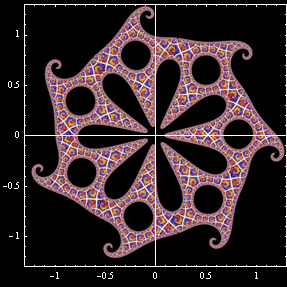
 Instead of translating the disk, we can create spikes around the outer perimeter by applying a tear drop transformation before the last step:
  . In this formula, s controls the length of the tear. This image uses s = 2.0 and b = 0.09097086761. Notice that the length of the spikes on the outer perimeter is greatly reduced in the last step. . In this formula, s controls the length of the tear. This image uses s = 2.0 and b = 0.09097086761. Notice that the length of the spikes on the outer perimeter is greatly reduced in the last step.
|
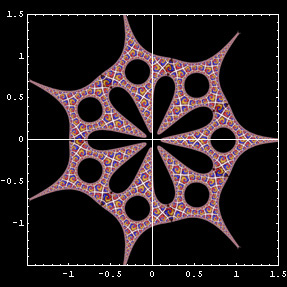 We can make the spikes as long as possible by taking the limit as s → ∞:
  . This image uses b = 0.19369325. . This image uses b = 0.19369325.
|
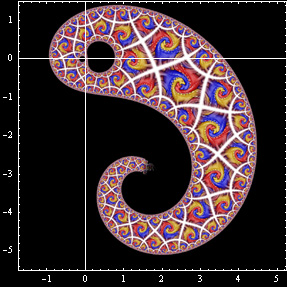
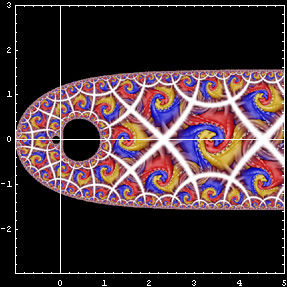
 Suppose we wanted to break the symmetry by including a spiral transformation. This would be easy enough if we used a non-conformal mapping, but we wish to restrict ourselves to conformal mappings. Unfortunately, I have not been able to find a very good way to do this near the center of the design, but the outer spikes can be made into spirals if a logarithmic spiral transformation is carefully applied in the previous step such that the region inside the unit disk is not significantly affected:
  , where , where  . This image uses σ = 4, α = -0.3, and b = 0.19369325. . This image uses σ = 4, α = -0.3, and b = 0.19369325.
|
|